
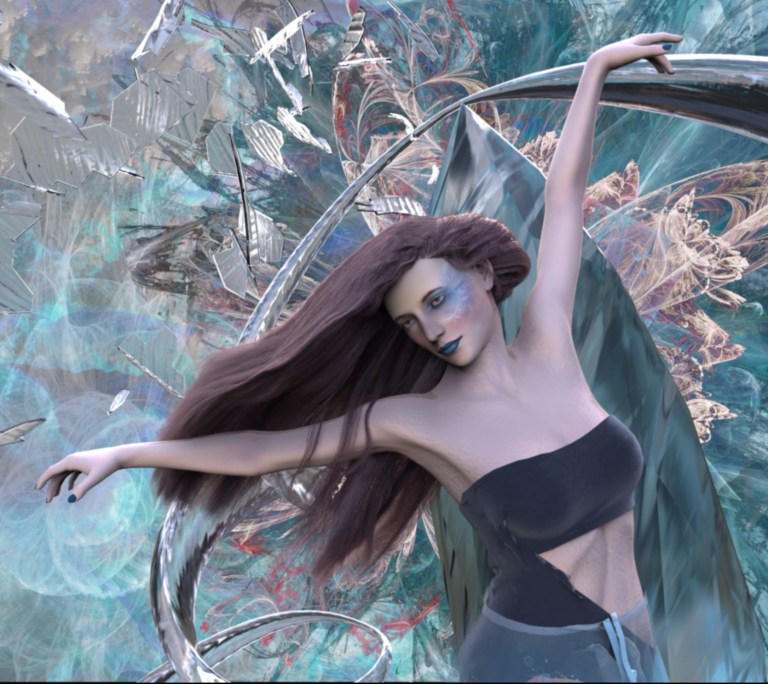
A 3D piece expressing my sense of freedom to pursue more artistic opportunities since graduating college
My key goal with this piece was to focus on learning some new aspects of the 3D pipeline that I did not have time to learn during school.
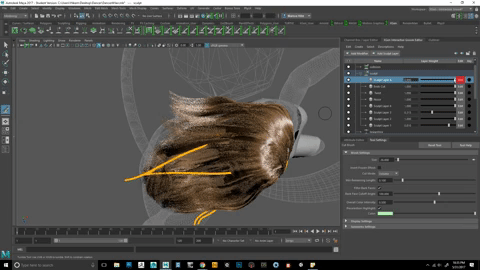
Creating and shaping hair as strands rather than sculpting from a separate piece of mesh completely blew me away with the sense of actually brushing a person’s hair.
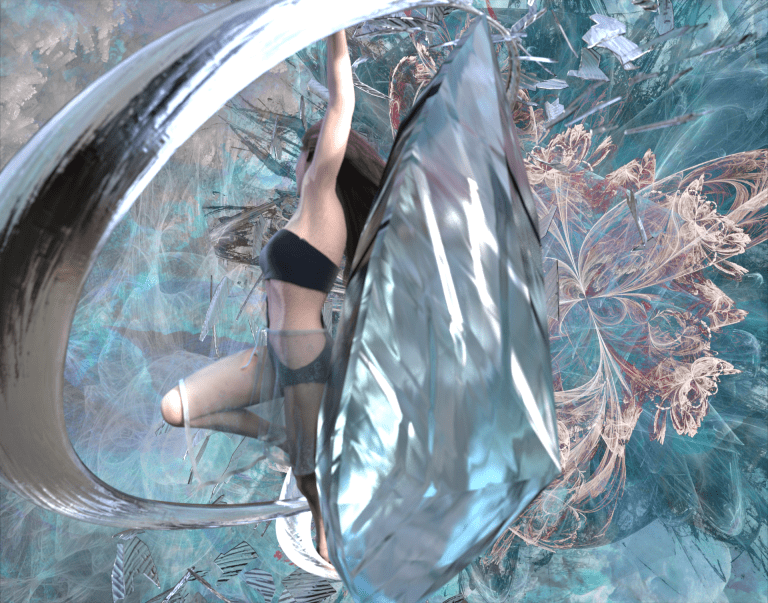
Ultimately, the biggest challenge I faced was to break the audience’s perception of a 2D background implemented as a ‘photo backdrop’ of sorts so that the 3D foreground elements did not appear out of place. To successfully achieve this effect, concepts were constantly being created and altered in order to put the focus on the main focal point, the dancer. For one, the color palette had to remain consistent for all aspects within the work, but by placing the swirls in a specific place for a specific camera angle the dancer appears much more natural than if a random gradient background was used. The movement of the 2D background is to push in while the 3D elements contrast to push out, thus creating a greater focus upon the contrasting element. I soon put more thought into how each piece works with one another rather than solely focusing on how the look individually. For example, each element compliments and pulls attention to one another until the viewer rests upon the dancer.
2D background -> 3D shatter pieces -> 3D whole pieces -> dancer
The gemstone further emphasized that straight, mostly vertical element which contrasts with the mostly circular elements surrounding the rest of the piece.

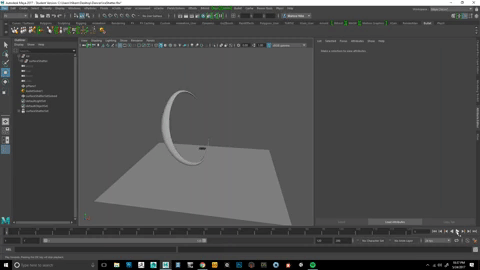
This project was also my first time using the shatter effects within Maya. Instead of retopologizing the messy topology that would be a result of my manual, carefree cutting, I was able to quickly create a more procedural and random breaking effect for the outer-most swirl because of this tool.

To be honest, it felt as though I was dressing up a doll throughout the dancer’s creation. From painting makeup to lengthening eyelashes it certainly felt as if my years of using makeup came in handy. ♥
As for my texturing process, UVing clothing has never gotten simpler as using Marvelous Designer. In order to create the cloth, I actually create the UVs first which provides me with already created seams. It makes the process so much easier! Combining that with Substance Painter where I can paint directly on the mesh and I now have much more control over painting over those seams. I highly recommend utilizing this method to be able to get those real time wrinkles and folds or wind direction. Below, you can see examples of some of the maps I was able to make in Substance as well as the nicely created seams from Marvelous.


All in all, this piece was a great learning opportunity in 3D composition, 3D -> 2D composition, rendering, and learning more tools to make future projects more efficient. Being able to reproduce hair is an imperative skill for any 3D generalist to have under his/her belt as well as good rendering techniques to achieve the visual texture of hair.
Software used:
- Maya
- DAZ Studio
- Zbrush
- Marvelous Designer
- Substance Painter
- Photoshop
- Keyshot
